Guide: Make almost any printer AirPrint compatible with a Raspberry Pi in 20 minutes!

Got a printer kicking around that you wish had AirPrint? Maybe it’s one you’ve had for several years, or maybe it’s a cheaper one you recently picked up and wished it had support for your iPhone, iPad or iPod touch. In any case, if you’ve got yourself a Raspberry Pi, have 20 minutes to spare and a tiny bit of experience with SSH, you can get your printer working natively in AirPrint in a flash!

It doesn’t matter whether your printer connects via USB, Ethernet or Wi-Fi – this trick will still work. I’ll guide you through the process!

Step 1: Ensure your Raspberry Pi is up to date.

This might seem like a no-brainer, but you’ll find yourself installing out of date software if you don’t keep your Pi’s sources up to date. Open up a VNC connection with your Pi and then open Terminal. Run the following:

sudo apt-get update

then

sudo apt-get upgrade

If there are any upgrades listed, type Y and press Enter to continue installing updates. Once that’s done, you can start installing your device.

Step 2: (If you’re connecting via USB) Connect your printer with its USB cable.

If you printer normally connects via USB, now would be a good time to connect it to your Pi’s USB port. If you’re currently connecting your printer via Ethernet or Wi-Fi, run straight to step 3. Don’t panic about unplugging it from about PC that it was connected to before – it’ll be a wireless printer soon!

Connect the printer to your Pi and reboot the Pi with the following command:

sudo reboot

Once it has rebooted and you’re back at a desktop, run Terminal again and then run:

lsusb

All devices that are connected via USB should be listed at this point. If your printer doesn’t show, make sure it is turned on and functioning normally.

Step 3: Install samba and CUPS.

At this point you can start installing the backbone software that will provide the printer networking. In terminal, run the following commands:

sudo apt-get install samba

You’ll probably see apt asking to install a relatively large number of packages – don’t worry about this, just press and then Enter to continue. When that’s done, then run:

sudo apt-get install cups

Again, you’ll see apt wanting to install an assortment of packages. Carry on as before! After that, you just need to add a printing administrator so that CUPS can manage printers on the Pi. Run the following command:

sudo usermod –a –G lpadmin pi

Step 4: Add your printer. 

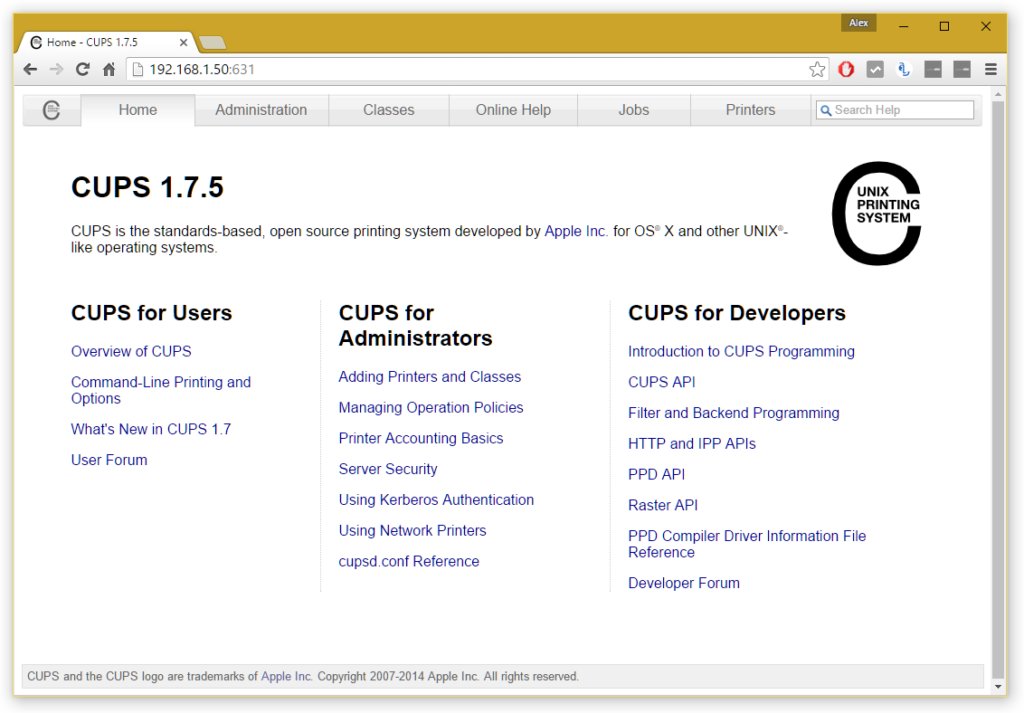
You now need to add your printer to your print server. To do this, you need to navigate to the CUPS user interface. Open up a web browser on your Pi and then navigate to 127.0.0.1:631. You should see something like this:

Home_-_CUPS_1.7.5_-_Google_Chrome_fcf924dd4bd74bcf8f5a3dacc57b826d

CUPS admin homepage

Click the Administration tab, then click Add Printer. You may be asked to switch to SSL at this point – just follow the link it tells you to go to. You’ll then be prompted to log in – just use your normal Pi credentials (username is usually Pi and the password either raspberry or whatever you might have changed it to.

Once you’re logged in, you should be given a list of currently connected printers. Find yours in the list – it should show up however it is connected (either by USB or over your network). Select it, then click Continue.

At the next step, give it a name (you can keep the default if you wish), a description (this is how your printer will be identified to your iDevice) and a location (optional). Make sure you tick Share This Printer and then click Continue.

Next, you need to select a driver. With any luck your Pi should have already identified a suitable driver – if not, you may need to scroll through the list until you find a suitable candidate. Then click Add Printer and select any default preferences you may have. Click Set Default Options when you’re done and that’s the hardest bit done!

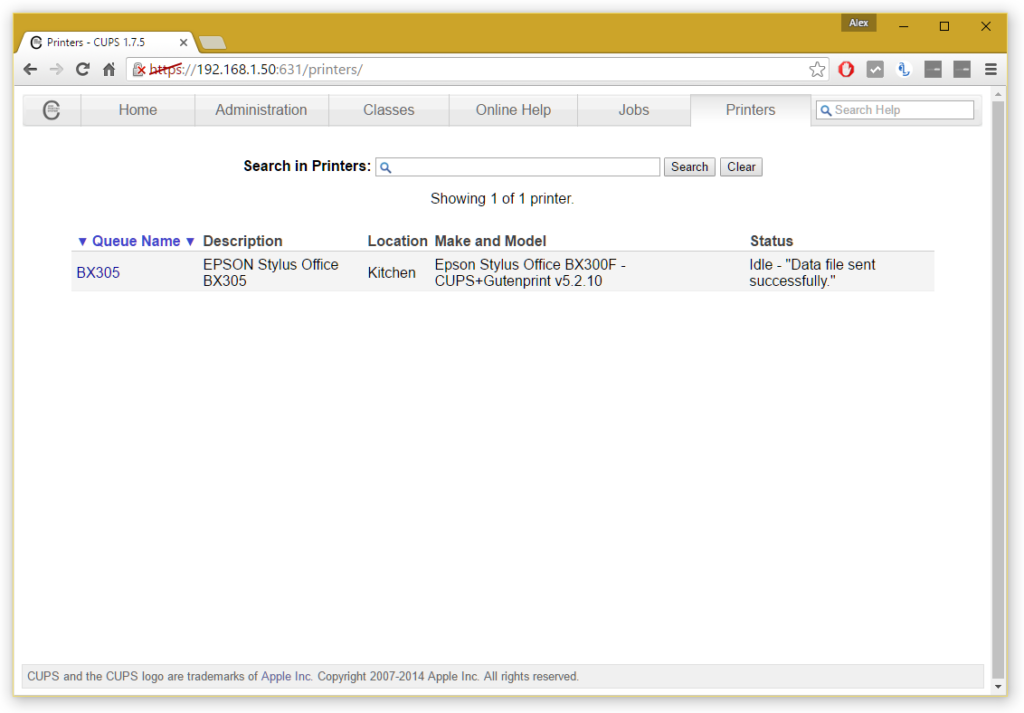
You can check the printer has been added successfully by heading over to the Printers tab and ensuring your printer is shown. To print a test page, select your printer from the list, click the Maintenance dropdown and then click Print Test Page.

Printers_-_CUPS_1.7.5_-_Google_Chrome_abe2589dedeb489098fd507ed7490519

Hopefully your printer is listed at this point!

Step 5: Fine tune a few settings.

A few settings should be fine tuned here to get best performance. Return to the Administration tab and check Share printers connected to this system. If you want to be able to manage CUPS (i.e. add new printers) remotely in future over your network, also check Allow remote administration. Then click Change Settings, the server will then reboot and you’re all good at this point.

Step 6: (Optional) Add Samba support for Windows networking

If you want to use your printer with a Windows device after this setup, you’ll need to activate Samba for Windows. To do this, run Terminal once more and run the following:

sudo nano /etc/samba/smb.conf

Scroll right to the bottom and then paste in the following:

# CUPS printing. See also the cupsaddsmb(8) manpage in the
# cupsys-client package.
printing = cups
printcap name = cups
[printers]
comment = All Printers
browseable = no
path = /var/spool/samba
printable = yes
guest ok = yes
read only = yes
create mask = 0700

# Windows clients look for this share name as a source of downloadable
# printer drivers
[print$]
comment = Printer Drivers
path = /usr/share/cups/drivers
browseable = yes
read only = yes
guest ok = no

Now, do CTRL and type in workgroup, followed by Enter to find workgroup configuration. Your workgroup is probably already correctly set it if you haven’t ever changed your workgroup before – if you have, set the correct name at workgroup =. Then change wins support = no to wins support = yes.

Then do CTTL + on your keyboard, followed by Enter, to save that configuration.

Restart samba with the following command:

sudo /etc/init.d/samba restart

Your printer will now work on a Windows network.

Step 7: (If your Raspberry Pi is connected to your network via Wi-Fi) Change a quick setting here.

Skip this step if your Pi connects to your network via an Ethernet cable. If it uses Wi-Fi, you need to turn off power saving for its Wi-Fi adapter to prevent it going to sleep and isolating AirPrint. To do this, you need to edit a file in Terminal:

sudo nano /etc/modprobe.d/8192cu.conf

Add the following at the bottom:

# No power saving
options 8192cu rtw_power_mgnt=0 rtw_enusbss=1 rtw_ips_mode=1

Then do another CTRL O, followed by Enter to save changes.

Step 8: Install Bonjour for AirPrint

Nearly there, I promise! You now need to install the AirPrint software. This is a doddle, thankfully!

Still in your Terminal, run the following command:

sudo apt-get install avahi-discover

Let that install as normal – this shouldn’t take long! Once that’s done, it would be a good idea to reboot your Pi to let all these settings sink in. In terminal, run:

sudo reboot

Step 9: Test it out! 

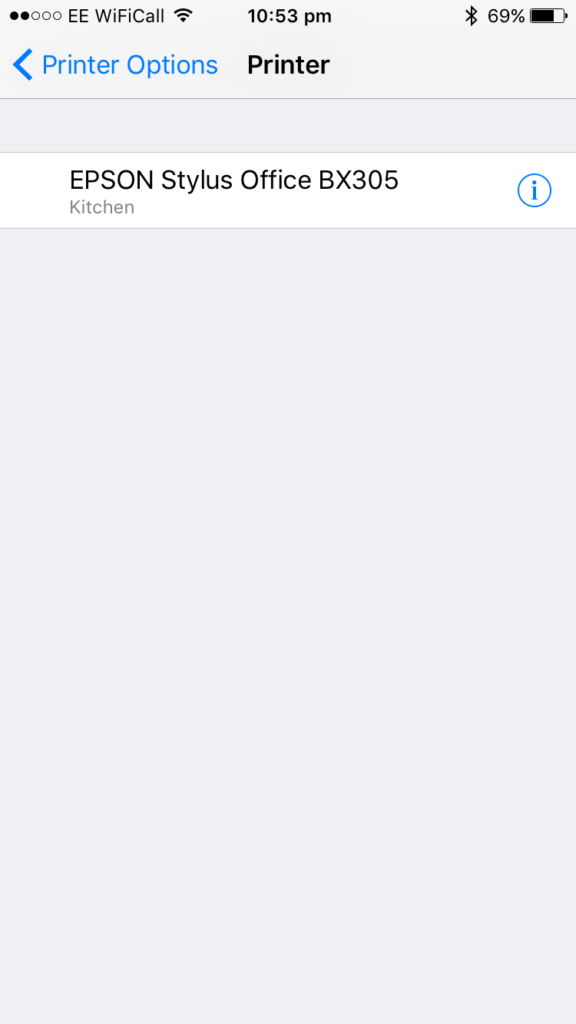
All should now be up and running – you’ll be pleased to know that’s the configuration done! Grab an iOS device, open up an email or Safari page, and follow the Share icon until you find a Print option. Hit Select Printer and yours should (fairly quickly) appear. If it doesn’t, don’t panic! Give it a couple more minutes and then try again – it should appear after a couple of tries the first time.

Your printer should appear at this point.

Your printer should appear at this point.

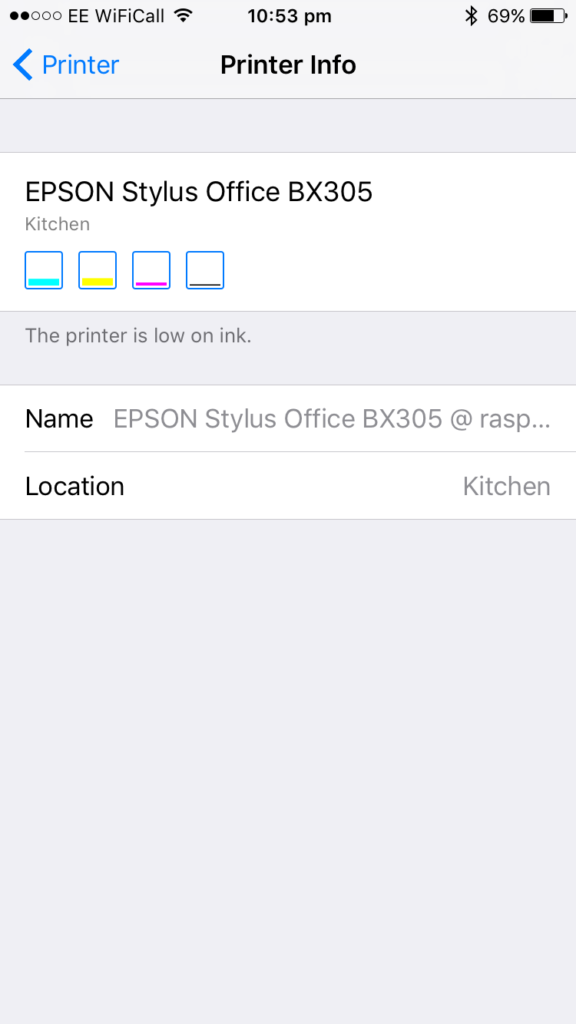
If you click the (i), you might even be able to check ink levels.

If you click the (i), you might even be able to check ink levels.

Select your printer, adjust any preferences you wish, and then click Print. Voila! It might take a few seconds to spool with your printer – this is to be expected.
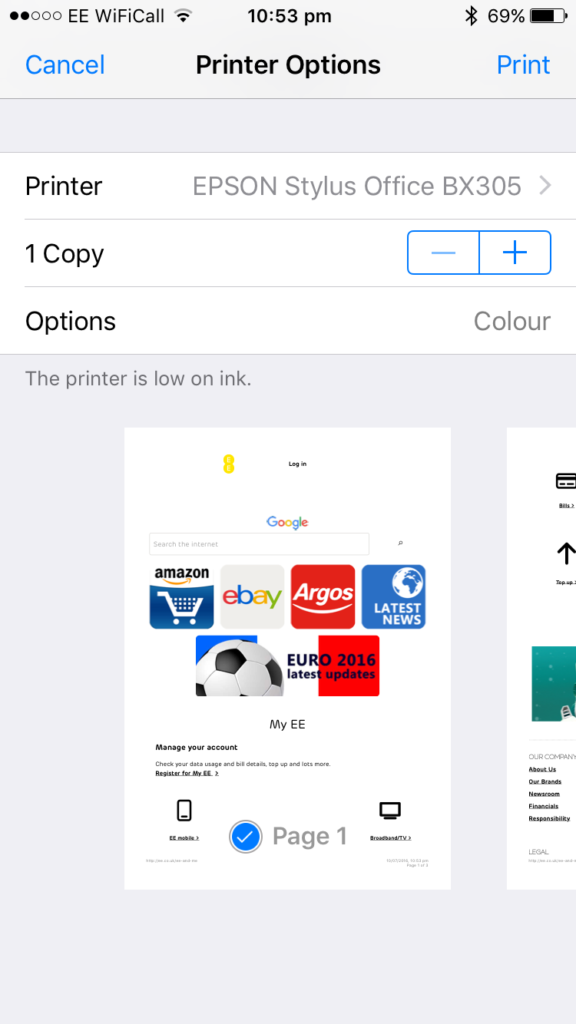
Once you've chosen the printer, adjust any preferences such as number of copies and page selection, then click Print.

Once you’ve chosen the printer, adjust any preferences such as number of copies and page selection, then click Print.

And there you have it! An AirPrint printer with a little configuration from your Pi. If you’d like to add more printers to your network, you’ll need to return to the CUPS administration panel and repeat Step 4. In any case, you should now have a printer that works over your network and on all of your favourite iOS devices, without the need for any third party app!
Review: Parrot Bebop 2 with Skycontroller and Flight Plan – fully kitted out!

Rating: ★★★★★

PROS:

  • Very easy to fly thanks to well made app and unbeatable Skycontroller
  • Flight Plan makes flying completely autonomous and allows for flights over huge distance
  • Battery life dramatically improved over original Bebop – now around 25 minutes
  • Stunning footage (if lacking a little clarity) and impressive image stabilisation

CONS:

  • Flying experience less fun without Skycontroller with less range
  • Flight Plan add-on costs £15
  • On-board memory not expandable

Buy now from Amazon – Bebop 2 only

Buy now from Amazon – Bebop 2 + Skycontroller

Parrot FreeFlight 3 app for iOS | Parrot FreeFlight 3 app for Android

I’m by no means new to the drone or quadcopter scene. In fact, I’ve owned several in the last few years and have experimented to various degrees and with varying levels of success. Most of the quadcopters I’ve tested in the past have been relatively basic – simple manually controlled quads with no ‘aritifical intelligence’ or automotive behaviour. The problem with the more basic quadcopters – such as the Syma X8C – is that they’re notoriously difficult to fly, borderline impossible to hover with and don’t take very good footage whatsoever! Their low price justifies them as they’re a very good starting point and basis for learning to fly – but they’re relatively useless if you want to want to take your quadcopter flying any further.

With that – bring in the Parrot Bebop 2! The Bebop 2 focuses on improving some of the drawbacks in the original Bebop. I was lucky enough to get to try the original Bebop last year, but unfortunately was let down by it’s poor build quality and terribly unstable connectivity with the app and Skycontroller. Not only that – but it really felt like a half-arsed effort, with a battery connector that had a cable hanging out and had to be tied in with velcro and a styrofoam type body kit! It was so poor that I even decided it wasn’t worth reviewing here – as I felt that most of the views I had were already online from some very frustrated customers!

Moving on from that though, Parrot went back to the drawing and gave it a facelift ready for MK2! Not only that, but they re-thought many of the key aspects of the device, including power, bodywork and functionality. I’m happy to say that, in my view, the new Bebop 2 is a huge improvement on the original and deserves a warm round of applause to Parrot. I’ve managed to get my hands on the full kit – the Bebop 2 itself, together with the professional Skycontroller and the Freeflight 3 app with Flight Plan functionality. You can guess what the rest of this post will be about – right?

Continue reading

UnoTelly – watch TV while you’re abroad with ease, eliminate geographic restrictions

Rating: ★★★★½

PROS:

  • Easy, practical way to reverse geographic restrictions
  • Cost effective at $4.95 for DNS alone package
  • Clever interface with easy configuration
  • Fast VPN servers

CONS:

  • VPN is a good extra to have, but don’t rely on it for security

Price: $4.95 (~£3.50) per month for DNS package, $7.95 (~£5.75) per month for DNS + VPN, discounts available on pre-payment

A hotly debated issue on the internet is the use of geographic restrictions on online multimedia. Some believe it’s a necessarily evil that protects rights holder’s interests while others think it simply restricts the concept of the internet. Whichever way you look at it, in most jurisdictions it is legal to use a VPN or “smart” DNS to circumvent geographical restrictions. It is normally down to the rights holder or streaming service to clarify whether using the service outside of its intended country of delivery is allowed or not. Just to be clear – I’m not condoning or protesting the use of these techniques to access services abroad – this is a review focused on the benefits of using UnoTelly.

This is by no means the first service I’ve tried with this objective. There are several ways of covering or manipulating your online location to access foreign services, but UnoTelly’s offering is an attempt to simplify the process and allow access to services not only on your PC or Mac, but also on devices such as the PlayStation 3 & 4, Apple TV and iPhone/iPad.

Using the UnoTelly website is a piece of cake. If you’re using the site from your desktop computer or laptop, you’re automatically prompted to set up DNS (and Dynamo if necessary) to be able to access your desired service. Once you’ve done that, there’s a built in directory of services that you can use. If there’s any specific guidelines for accessing a certain service, these are provided with clear simple instructions.

Using UnoTelly one other devices is a little more complicated but still relatively easy to do. First of all, you need to activate your network’s IP address against UnoTelly’s firewall. This can either be done manually on demand or automatically via a dynamic DNS setting on your wireless router. Once that’s done, you simply set the DNS server address on the device you’d like to use, configure the Dynamo setup to match the region of each service you’d like to use, and then fire up the relevant app! Thankfully, once you’ve done this the first time, settings are always preserved so you should only have to configure it once (unless you wish to change regions).

The service works seamlessly and made mince meat of my heavy demands and frequent server changes. The online interface is very easy to use and serves as a useful service guide.

All of the above is covered under the primary UnoDNS offering. The second offering that UnoTelly has is their UnoVPN service. A VPN is another way that geographical restrictions can be avoided, as all of your internet traffic is routed through a foreign server in the country you’re intending to view from. For some users, the VPN service will be simpler and quicker to use – particularly if you’re primarily going to want to benefit from UnoTelly on PC or Mac. For most people, however, the UnoDNS service will more than suffice and if you’re using set-top boxes or smart TVs you’ll find the DNS service much easier to set up.

That’s not to say the VPN is bad at all, though. Once you’ve got it set up (instructions are provided for many devices but the service is mainly aimed at PC and Mac users), it’s permanently configured on your device and can be switched on or off on demand. Speeds from the UnoTelly VPN servers were very impressive, with consistently high speed test results across all of their servers. However – be warned – if you’re intending to use your UnoVPN service as a security measure (as many VPN users do), you’ll be disappointed. The PPTP authentication method that UnoVPN uses is very basic and widely regarded as insecure. UnoTelly does stress, however, that their service is designed to be used for performance and not security – so don’t get your hopes up.

In conclusion, UnoTelly provides a very simple and user-friendly method of accessing international multimedia services and gives you the ultimate choice between DNS redirection and VPN routing. The service functions flawlessly, even if it does need a little time to set to optimal settings. As the saying goes, it “does exactly what it says on the tin”!

You can get a free 8-day trial here.

Review: Lenovo Yoga 300 Intel Celeron 11.6″ Convertible – practical portability from Lenovo

This slideshow requires JavaScript.

Rating: ★★★★

PROS:

  • Good all-rounder for most day-to-day tasks
  • Very decent keyboard with good feedback and decent key size
  • Excellent range of connectivity (3x USB, HDMI, Ethernet, Bluetooth)
  • Very decent wireless connectivity with dual band 802.11ac support
  • Very powerful and cleverly designed charger

CONS:

  • Touchpad leaves a lot to be desired
  • Intel Celeron processor performs reasonably well but isn’t hugely energy efficient
  • 2GB RAM is fixed and cannot be upgraded
  • Low resolution display (1366×768/720p)

Buy now from Amazon – best price at time of writing £159.99

Buy now from eBay UK – from £210 NEW or £160 NEARLY NEW

It’s been a little while since I last wrote a review for a portable computer, so I thought I’d head back to my roots and see what’s new on the market at the moment. I managed to pick up this budget Lenovo Yoga 300 tablet online and I’ve put it through it’s paces.

The Yoga line from Lenovo is nothing new. The concept is simple – any “Yoga” device has 360° hinges meaning that it is essentially a “convertible” and can theoretically be used as both a tablet and a conventional notebook computer. Yoga laptops from Lenovo have been around since 2012 and the release of Windows 10, but since then they have become more refined and have picked up several improvements.

Inside the box you get the notebook itself, a 45W mains adapter and a small amount of paperwork. Unboxing the device and powering it up for the first time was fairly simple – except I found that I had to plug the unit in for the first time before it would boot (despite having almost a complete charge from the outset). Relatively promptly you’ll end up at the Windows 10 setup screen (Windows 10 now comes pre-installed on these devices, despite earlier versions being available with Windows 8.1). It’s the usual set of set up questions, with the exception of one additional step for Lenovo registration (which is optional). Once you’re done with that, the notebook will reboot and you’ll be ready to go fairly quickly. The notebook comes with a fair amount of additional pre-installed software, such as various Lenovo tools (handy but not strictly necessary) and a 30 day trial of McAfee LiveSafe which is OK but nowhere near as responsive as Norton Security or even Windows Defender (which is free and comes with Windows).

The first thing I noticed with this notebook is the quality of the keyboard. Lenovo really seem to have a knack for putting together really decent keyboards with just the right level of typing feedback and the perfect level of movement, making lengthy periods of typing an absolute breeze. As I use a pretty wide variety of keyboards very frequently, it did take me a little while to pick up the position of prominent keys such as enter and shift, but this was a minor bugbear that’s very common with new devices.

Sadly, the same really can’t be said for the touchpad. It still baffles me as to why manufacturers decided to remove the physical left and right mouse buttons and rely on either the tap-to-click function or, worse still, a designated area that is possible to tap but almost impossible to click and drag. Youch! It’s not unusable by any means – it’s just such a shame that manufacturers haven’t learnt this lesson. For simple navigating as a mouse pointer it’ll work without issue – it’s just so painful trying to move things with a finger and thumb! This technique only seems to work with Apple MacBooks – primarily because they have a large enough touchpad area to make the idea workable. For everything else – forget it!

Thankfully, there are other areas where this device really shines. The overall build quality is very impressive and device feels really solid. The brushed black metal that lines the lid and chassis looks very professional – although it does show wrist marks a little more than I’d like. The touchscreen display also works impeccably, with very little delay and a high level of accuracy.

Connectivity stands out on this device with a grand total of three USB ports (consisting of 2x USB 2.0 and 1x USB 3.0), a full size HDMI connector, a collapsible gigabit Ethernet port, a full size SD card reader and a 3.5mm headphone jack. For a device that is just 14mm thin from bottom to keyboard level, this is seriously impressive. Having the USB ports is eternally useful on these portable devices – especially as one of them is what Lenovo call an “always-on” USB port, which basically means it’ll charge devices such as your mobile phone even if the computer is completely switched off (essentially acting as a portable battery bank). Furthermore, the device comes with a very well designed reversible 45W power adapter, meaning that charging from flat to full only takes around two hours and is easy to connect in low light. These small things matter!

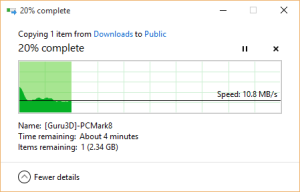
File transfer speeds over the on-board wireless 802.11ac adapter were impressive.

File transfer speeds over the on-board wireless 802.11ac adapter were impressive.

File transfer speeds over the on-board wireless 802.11ac adapter were impressive.In addition to physical connectivity, you also have very decent dual band wireless 802.11ac networking, which performs very well. When transferring a large file from my NAS to the device over around a 10m distance through two floor levels, I was still achieving in excess of 11MB/s (~85Mbit/s) which is perfectly adequate and on a par with my much more powerful MacBook Pro. The device will of course still pick up your older 802.11a/b/g/n networks too.

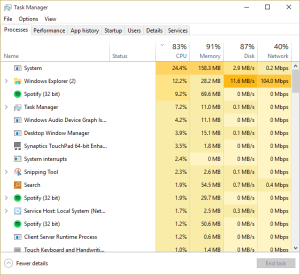
Running multiple applications ate up the RAM fairly quickly, but the device handled basic multitasking well.

Running multiple applications ate up the RAM fairly quickly, but the device handled basic multitasking well.

Running multiple applications ate up the RAM fairly quickly, but the device handled basic multitasking well.Actual performance from a benchmarking point of view is more or less par for the course given the specs of the device. With a 1.83Ghz Intel Celeron processor (with Turbo Boost up to 2.25Ghz) and 2GB of RAM, it’s no ground breaker. It’s perhaps a little more snappy than the similarly priced Linx 1010 tablet, but the Atom processor in the Linx is a fair bit more efficient in terms of power consumption and this shows in the around 4-5 hour battery life while in light use on the Lenovo. Nonetheless, most apps load very quickly and boot times are better than average for a device of this class. It’s a shame to see a 11.6″ device with only 2GB of RAM as this will hold you back if you want to run several applications at once, but there are more expensive models available with better specs. As would widely be expected most basic applications (such as Spotify, Microsoft Office and Google Chrome) will run simultaneously without too much trouble. Streaming 1080p video from YouTube was flawless (even though the device has a 720p display).

There are a couple of other minor niggles that might irritate a few people. Unsurprisingly, the on-board speakers are weak and lack bass – I wouldn’t want to use them for any extended period of music playback. The keyboard, while very comfortable to use as aforementioned, lacks a couple of useful keys. There’s no skip forward and backward function keys, which meant I frequently had to stop what I was doing and pull up Spotify to skip between tracks. The bezel around the display is surprisingly large and leads me to wonder whether Lenovo would have been capable of providing a slightly larger screen area without having to increase the size of the device. Finally, there is a tiny of bit of play in the hinges on the device, so if you type quite heavily (like me) you might experience a teeny bit of screen wobble which, while not enough to annoy me, was a little too noticeable in some scenarios.

Overall, it’s a very impressive device but just has a couple too many minor issues to warrant a five star review. Don’t get me wrong – sometimes I can be a little picky with these minor things, but that’s what reviews are for! It does what it’s designed to do and makes working in a small space very enjoyable – which is much more than can be said for some other devices in this class. Who would I recommend it to? Well, if you’re looking for something to type up reports on the go with or you feel the need to be connected to your emails and social media around the clock this is probably the perfect device for you. If you’re looking for a larger laptop replacement that’ll cope with more demanding tasks such as multimedia editing or gaming, look elsewhere as you’ll want something with more defined internal specifications.

Buy now from Amazon – from £210

Buy now from eBay UK – from £210

See also: Linx 1010 Review – best Windows 10 tablet on the market right now?

Review: Kehan KH821-30V C821 Dashcam

Rating: ★★★★½

PROS:

  • Very decent daytime footage
  • Easy to install with cleverly designed windscreen mount
  • Low price

CONS:

  • Automatic recording doesn’t always work

Buy now from Amazon (price at time of writing £62.99)

Buy now from eBay UK (price at time of writing £60.22)

In the latest in the string of dashcam reviews I’ve been taking a look at the Kehan KH8210-30V. Here are my thoughts.

Upon unboxing the dashcam, I immediately noticed that its housing is actually quite uniquely designed and well thought through. Inside the box you get all of the usual components you’d expect – the dashcam itself, a super long power cable for your car, as well as a (very basic) manual and a windscreen mount.

Setting up the dashcam is very simple. First, pop your memory card into the dashcam and turn it on (you may need to plug it into the mains the first time you use it). Configure your basic preferences such as recording length, resolution, and sensor sensitivity by using the clearly marked buttons on either side of the screen. I have to admit I was very impressed by the simplicity of the UI and well labelled buttons beside the display.

Once you’ve got your settings and preferences configured, you’re ready to fit the dashcam in your car. There’s nothing particularly unusual here, except from the useful addition of the power connector within the windscreen mount. What this means is that you can wire the power source for the dashcam into the windscreen mount rather than directly into the dashcam. Why, you might ask? Well, it actually makes it considerably easier to dock and undock the dashcam – particularly if, like me, you feel the need to remove the dashcam from display when you aren’t in your vehicle. Definitely a feature I haven’t seen elsewhere as yet.

Recording performance is very decent with this dashcam. I got some very impressive results in my tests – most notably when testing during the daytime. Shown below is some test footage that I uploaded to YouTube. The YouTube footage shows the very decent wide angle that the camera captures. Night time footage was also fairly good, with decent pickup of nearby vehicles even with no other lighting.

Overall, I was very impressed with this dashcam and I personally can find very little to complain about (for once!). The only minor niggle I came across when I tested the unit was that in some cases recording didn’t automatically start when I pulled away. Other than that, the camera worked flawlessly and represents a good value for money solution.

Buy now from Amazon (price at time of writing £62.99)

Buy now from eBay UK (price at time of writing £60.22)