Tag Archives: iphone

Guide: Make almost any printer AirPrint compatible with a Raspberry Pi in 20 minutes!

Got a printer kicking around that you wish had AirPrint? Maybe it’s one you’ve had for several years, or maybe it’s a cheaper one you recently picked up and wished it had support for your iPhone, iPad or iPod touch. In any case, if you’ve got yourself a Raspberry Pi, have 20 minutes to spare and a tiny bit of experience with SSH, you can get your printer working natively in AirPrint in a flash!

It doesn’t matter whether your printer connects via USB, Ethernet or Wi-Fi – this trick will still work. I’ll guide you through the process!

Step 1: Ensure your Raspberry Pi is up to date.

This might seem like a no-brainer, but you’ll find yourself installing out of date software if you don’t keep your Pi’s sources up to date. Open up a VNC connection with your Pi and then open Terminal. Run the following:

sudo apt-get update

then

sudo apt-get upgrade

If there are any upgrades listed, type Y and press Enter to continue installing updates. Once that’s done, you can start installing your device.

Step 2: (If you’re connecting via USB) Connect your printer with its USB cable.

If you printer normally connects via USB, now would be a good time to connect it to your Pi’s USB port. If you’re currently connecting your printer via Ethernet or Wi-Fi, run straight to step 3. Don’t panic about unplugging it from about PC that it was connected to before – it’ll be a wireless printer soon!

Connect the printer to your Pi and reboot the Pi with the following command:

sudo reboot

Once it has rebooted and you’re back at a desktop, run Terminal again and then run:

lsusb

All devices that are connected via USB should be listed at this point. If your printer doesn’t show, make sure it is turned on and functioning normally.

Step 3: Install samba and CUPS.

At this point you can start installing the backbone software that will provide the printer networking. In terminal, run the following commands:

sudo apt-get install samba

You’ll probably see apt asking to install a relatively large number of packages – don’t worry about this, just press and then Enter to continue. When that’s done, then run:

sudo apt-get install cups

Again, you’ll see apt wanting to install an assortment of packages. Carry on as before! After that, you just need to add a printing administrator so that CUPS can manage printers on the Pi. Run the following command:

sudo usermod –a –G lpadmin pi

Step 4: Add your printer. 

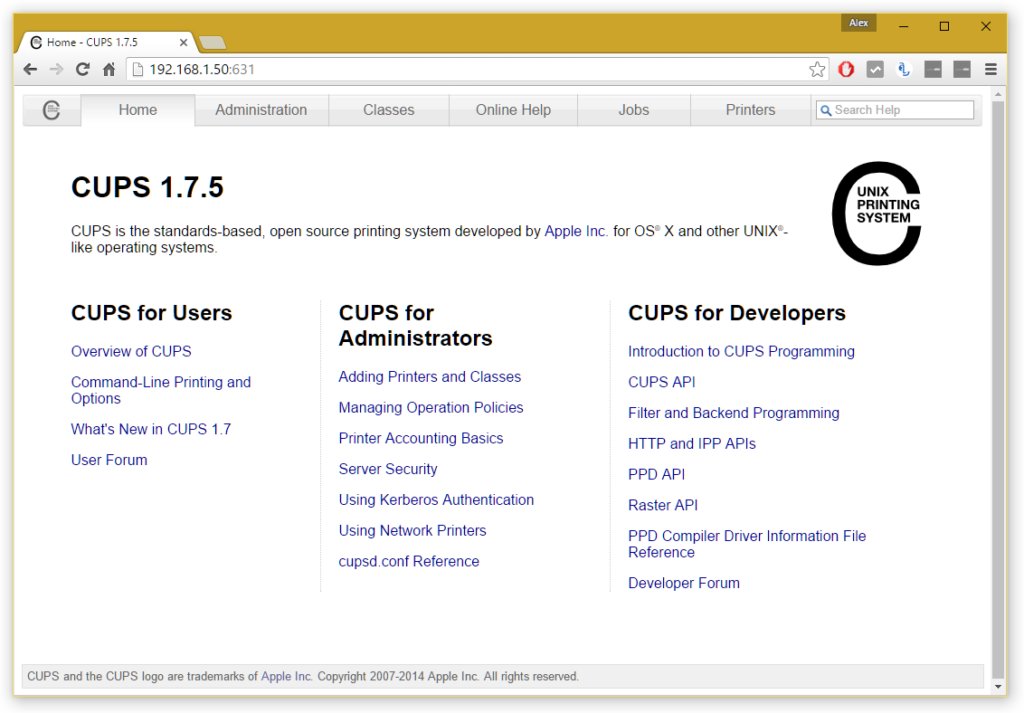
You now need to add your printer to your print server. To do this, you need to navigate to the CUPS user interface. Open up a web browser on your Pi and then navigate to 127.0.0.1:631. You should see something like this:

Home_-_CUPS_1.7.5_-_Google_Chrome_fcf924dd4bd74bcf8f5a3dacc57b826d

CUPS admin homepage

Click the Administration tab, then click Add Printer. You may be asked to switch to SSL at this point – just follow the link it tells you to go to. You’ll then be prompted to log in – just use your normal Pi credentials (username is usually Pi and the password either raspberry or whatever you might have changed it to.

Once you’re logged in, you should be given a list of currently connected printers. Find yours in the list – it should show up however it is connected (either by USB or over your network). Select it, then click Continue.

At the next step, give it a name (you can keep the default if you wish), a description (this is how your printer will be identified to your iDevice) and a location (optional). Make sure you tick Share This Printer and then click Continue.

Next, you need to select a driver. With any luck your Pi should have already identified a suitable driver – if not, you may need to scroll through the list until you find a suitable candidate. Then click Add Printer and select any default preferences you may have. Click Set Default Options when you’re done and that’s the hardest bit done!

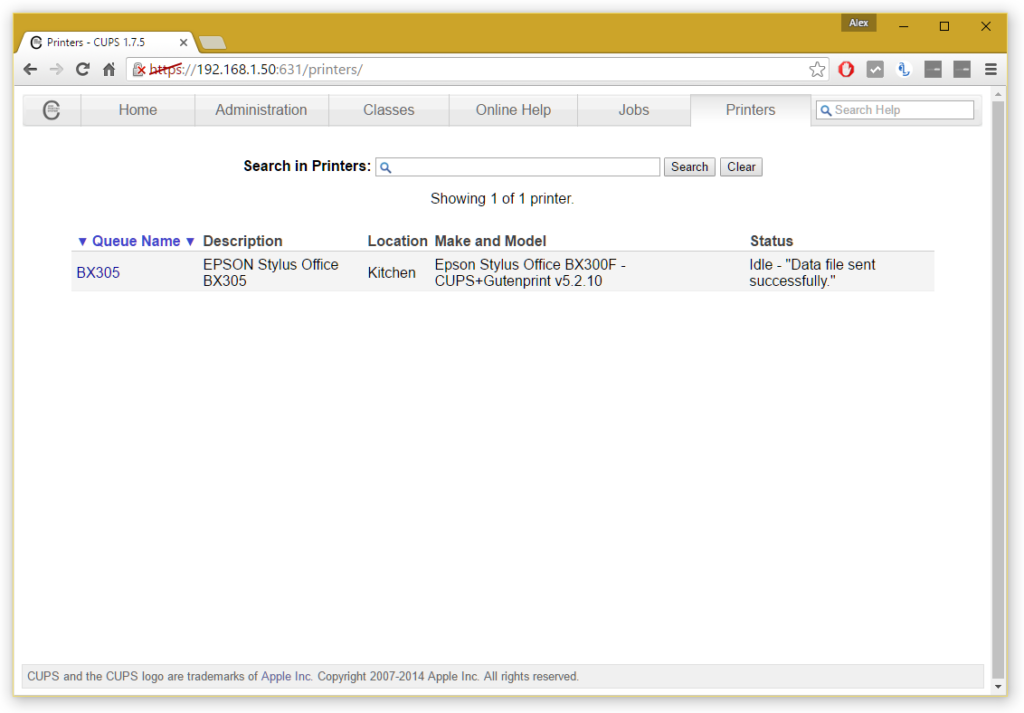
You can check the printer has been added successfully by heading over to the Printers tab and ensuring your printer is shown. To print a test page, select your printer from the list, click the Maintenance dropdown and then click Print Test Page.

Printers_-_CUPS_1.7.5_-_Google_Chrome_abe2589dedeb489098fd507ed7490519

Hopefully your printer is listed at this point!

Step 5: Fine tune a few settings.

A few settings should be fine tuned here to get best performance. Return to the Administration tab and check Share printers connected to this system. If you want to be able to manage CUPS (i.e. add new printers) remotely in future over your network, also check Allow remote administration. Then click Change Settings, the server will then reboot and you’re all good at this point.

Step 6: (Optional) Add Samba support for Windows networking

If you want to use your printer with a Windows device after this setup, you’ll need to activate Samba for Windows. To do this, run Terminal once more and run the following:

sudo nano /etc/samba/smb.conf

Scroll right to the bottom and then paste in the following:

# CUPS printing. See also the cupsaddsmb(8) manpage in the
# cupsys-client package.
printing = cups
printcap name = cups
[printers]
comment = All Printers
browseable = no
path = /var/spool/samba
printable = yes
guest ok = yes
read only = yes
create mask = 0700

# Windows clients look for this share name as a source of downloadable
# printer drivers
[print$]
comment = Printer Drivers
path = /usr/share/cups/drivers
browseable = yes
read only = yes
guest ok = no

Now, do CTRL and type in workgroup, followed by Enter to find workgroup configuration. Your workgroup is probably already correctly set it if you haven’t ever changed your workgroup before – if you have, set the correct name at workgroup =. Then change wins support = no to wins support = yes.

Then do CTTL + on your keyboard, followed by Enter, to save that configuration.

Restart samba with the following command:

sudo /etc/init.d/samba restart

Your printer will now work on a Windows network.

Step 7: (If your Raspberry Pi is connected to your network via Wi-Fi) Change a quick setting here.

Skip this step if your Pi connects to your network via an Ethernet cable. If it uses Wi-Fi, you need to turn off power saving for its Wi-Fi adapter to prevent it going to sleep and isolating AirPrint. To do this, you need to edit a file in Terminal:

sudo nano /etc/modprobe.d/8192cu.conf

Add the following at the bottom:

# No power saving
options 8192cu rtw_power_mgnt=0 rtw_enusbss=1 rtw_ips_mode=1

Then do another CTRL O, followed by Enter to save changes.

Step 8: Install Bonjour for AirPrint

Nearly there, I promise! You now need to install the AirPrint software. This is a doddle, thankfully!

Still in your Terminal, run the following command:

sudo apt-get install avahi-discover

Let that install as normal – this shouldn’t take long! Once that’s done, it would be a good idea to reboot your Pi to let all these settings sink in. In terminal, run:

sudo reboot

Step 9: Test it out! 

All should now be up and running – you’ll be pleased to know that’s the configuration done! Grab an iOS device, open up an email or Safari page, and follow the Share icon until you find a Print option. Hit Select Printer and yours should (fairly quickly) appear. If it doesn’t, don’t panic! Give it a couple more minutes and then try again – it should appear after a couple of tries the first time.

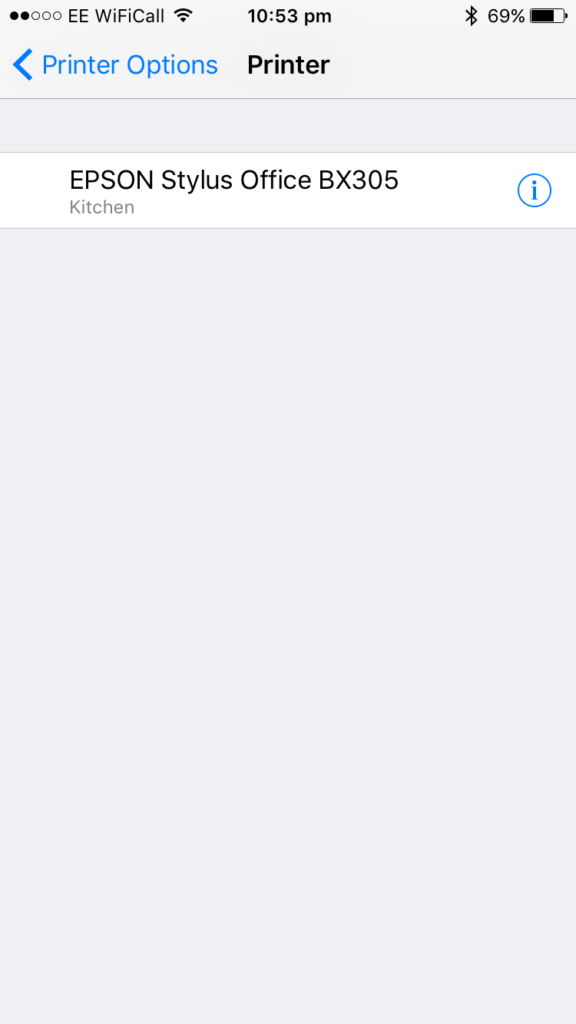
Your printer should appear at this point.

Your printer should appear at this point.

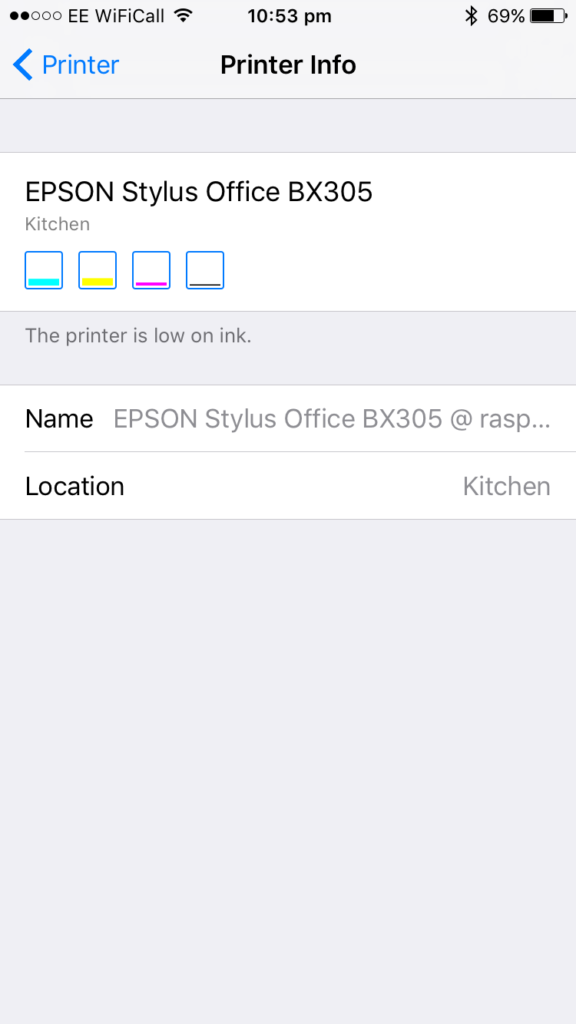
If you click the (i), you might even be able to check ink levels.

If you click the (i), you might even be able to check ink levels.

Select your printer, adjust any preferences you wish, and then click Print. Voila! It might take a few seconds to spool with your printer – this is to be expected.
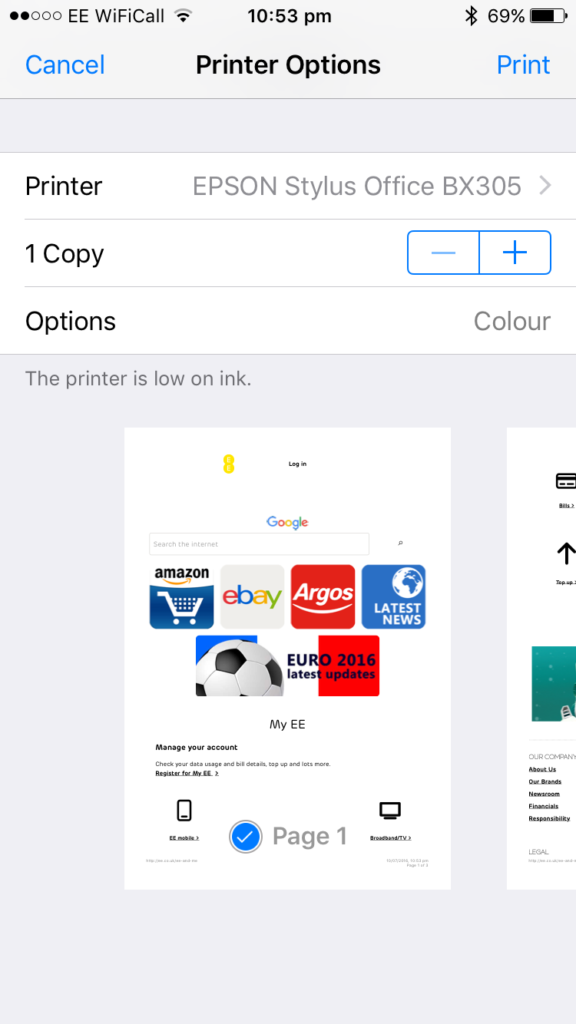
Once you've chosen the printer, adjust any preferences such as number of copies and page selection, then click Print.

Once you’ve chosen the printer, adjust any preferences such as number of copies and page selection, then click Print.

And there you have it! An AirPrint printer with a little configuration from your Pi. If you’d like to add more printers to your network, you’ll need to return to the CUPS administration panel and repeat Step 4. In any case, you should now have a printer that works over your network and on all of your favourite iOS devices, without the need for any third party app!
Review: 1byone Battery Case for iPhone 6 and 6s

This slideshow requires JavaScript.

Rating: ★★★★½

PROS: 

  • Adds at least an entire extra charge to your iPhone
  • Acts as a durable case for your phone
  • Two bumper colours included in the box
  • Includes audio cable so headphones can still be used

CONS:

  • Adds a little weight to your phone
  • Case charges with microUSB – could be seen as a minor downside to some

RRP £32.99, best price at time of writing £25.99 on Amazon

This particular product was an interesting one for me. I, for the most part (and we do have our disagreements occasionally!), love my iPhone 6 and use it extensively in my day-to-day life. And there’s no doubt about it – it’s a fantastic phone with huge amounts to offer – without even mentioning the new iPhone 6s that has countless additional new features (some of which I think are great, others a tad gimmicky). However, nothing can escape the fact that battery life on most high-end smartphones is still nothing to shout about.

So what can you do about this? Imagine the typical scenario – you’re out and about in the countryside for a weekend or you’ve made your way to a music festival. And half way through your trip your phone battery hits critical. We’ve all been there. Well, there’s really two choices if you haven’t got any form of mains power. Either, you can buy a power bank such as this one (I own a similar model by the same brand), or you can buy a bespoke design battery case for your phone.

And that’s exactly what this is. It works just like any other power bank you might have come across. You simply slide the phone into the case, making sure the lightning port is lined up correctly and pop either of the two included bumpers over the top. On the back, you have a simple power button together with a 4-LED charge indicator. Simply press and hold the rear power button until you iPhone starts charging and that’s all you need to do. You can tap the power button whenever the device is switched on to see the current battery status. When you’re done, you simply press and hold the power button once again and the battery case switches off.

So how well does this one work? Fairly well indeed. It charged my iPhone nice and quickly, and because this device is MFI certified, you can be sure that you won’t get any compatibility issues or charging errors on your phone. I comfortably got an entire phone charge out of the case with a little juice to spare, so for those extended trips where you could use the backup power, this is a must have.

Would I keep it permanently attached to my phone? Probably not. You can by all means do that if you want to – you simply charge the battery case with the included cable and then use that to charge your phone. But I probably wouldn’t. It’s a little too big to keep on my phone all the time, and I would probably keep other cases on the phone when I didn’t need the extra capacity.

However, for its intended purpose, it does a fantastic job and it’ll definitely be a vital tool for when I do go on my travels. It’s ideal for people who enjoy camping, long treks, visiting rural countryside or really anything that keeps you away from the mains for a while. Even those tedious long haul economy flights without a power socket.

Overall, I’m delighted with the device and it certainly will end up permanently in my travel backpack. It’s not the cheapest portable charger on the market at around £30, but the benefit of being able to leave it attached to your phone without cables dangling all over the place certainly outweighs any increased expense.

Buy now from Amazon

Review: Urban Armor Gear Scout Folio iPhone 6 case

Rating: ★★★★☆

Phone cases are often a really difficult issue for me – trying to find a case at the right price which is durable and designed with the usability in mind is often tedious.

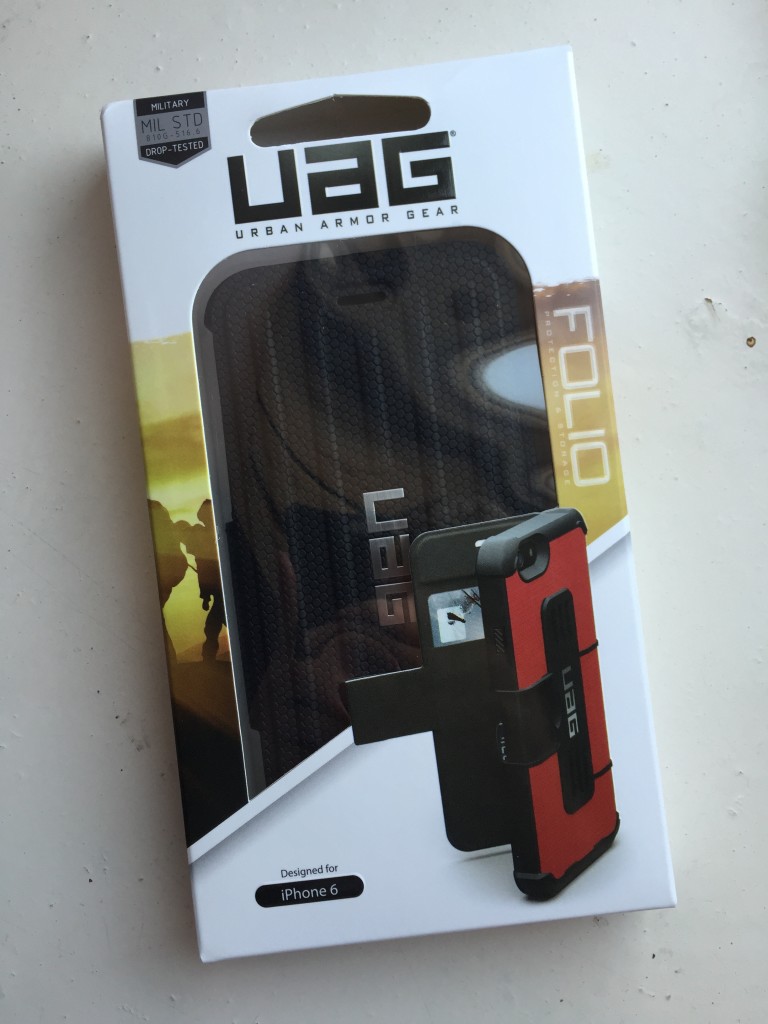
I recently managed to get my hands on one of Urban Armor Gear‘s latest offerings for my iPhone 6. They have a very large selection of cases for most recent phone models and they offer you a wide variety of case types. Being a bit obsessed with keeping my phone’s screen scratch and dirt free, I opted to go for their iPhone 6 Scout Folio case.

IMG_0996

The case arrived very quickly direct from the US having ordered directly from UAG – I was very impressed that it got across the pond to my UK address in around 5 days!

The case itself looks really well built and certainly worth the approximately £25 it would cost here in the UK. My iPhone fits very snugly into the case and doesn’t move around at all.

(Screen protector is NOT included)

When you place the phone into the case, you immediately notice the thickness of the strong rubberised material around the phone. It certainly gives the impression that the case would withstand drops even on to nasty surfaces like stone.

With regards to the folio part of the case, it covers the front of the phone well and a fairly strong magnet keeps the case closed. For me, I perhaps would have liked to have seen the magnet slightly stronger – as when I drop tested the case myself from around 5 metres the case did open when dropped. A button popper might have been a slightly better choice in my view. Nonetheless, because of the thickness of the material surrounding the device, the device was well protected regardless of whether the case opened or not.

The folio cover also comes with a card slot which really impressed me. Many of my debit and credit cards are now contactless meaning I can make micro payments without needing to enter my PIN or insert my card into the reader. The design of this case made this feature so easy to use and meant I could leave a single card in the case just for contactless payments. The card is also easily removable if you need to use it for conventional transactions.

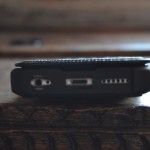
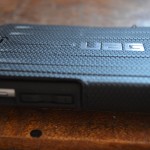
All ports are easily accessed (see the photos above) which is a vital plus point for me. I don’t think the case would fit very well into a dock connector, but that’s very commonly an issue with most cases.

Overall, I was very impressed with the case and certainly feel that its a strong, reliable case that gives a very high level of protection. If you work in the sort of environment where your phone is likely to get abused through drops and knocks, this is certainly a very good range of cases to consider.

Who needs 4G (LTE) when DC-HSDPA outruns it anyway?

First of all, I know this is the first post on GEEK! in around 3 months – sorry about that. I have to say, as I start diving deeper into work and education, I’m running out of time to blog. I’ll try to post a bit more once college is over.

Anyway, I recently gave in and returned (after nearly 4 years) to 3. I used to be with them when I had my Nokia 3120 Classic (good times) on PAYG, but times have changed a fair bit since then and I can afford a snazzy iPhone 5 contract. I thought a lot about who to go with, but I have to say 3 quickly sealed the deal with their One Plan. I mean – come on – who would turn down oodles of minutes/texts and, more importantly, all-you-can-eat (quite literally – it’s realistically up to 1000GB a month) data and tethering for £36 a month? Better still, EE and 3 are the only two networks capable of ever providing LTE for the iPhone 5, so with the promise of that later in the year, it’s almost impossible to say no. EE’s £36 a month deal gives you 500MB a month, which almost questions why you’d even benefit from 4G with a limit that small.

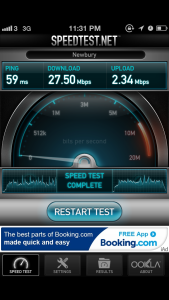
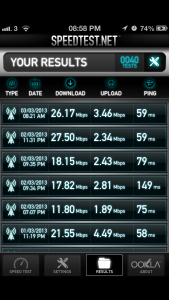
Ok, so the awesome deal had pretty much perfected for me – until I got home and actually used it. Now, bearing in mind, at home I get roughly 7Mbps a second on our stone-age ADSL, I was pretty astounded when I started getting speeds such as this through my iPhone…

IMG_0017Ok, that’s only one test. It’s only fair to do a few, so here’s a good sample.

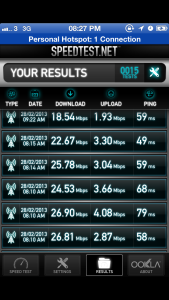
IMG_0016

IMG_0043

Not bad really? Overall, while at home, I’m averaging around 22Mbps. For me, it questions what benefit there really is to LTE. If I can get these kind of speeds from DC-HSDPA, why would anybody pay such a high premium for 4G?

The speed still holds up fairly well in the city too. My local city is Oxford, and I can happily get speeds of around 10-15Mbps. Given that the network will undoubtedly be under much heavier strain in densely populated areas, it still copes very well.

For me, though, in theory it only gets better. In September/October, EE will hand over a segment of the 1800Mhz LTE spectrum to 3, giving them a very valuable resource. And to top it all off, 3 have told us we won’t have to pay a penny more for it.

3 deserve to be shouting about this way more than they actually are – frankly I don’t think it’s given anywhere near enough credit for what it is.

Nonetheless, I’m delighted to be back with 3. For those that are interested – the plan I’m on is the £36 a month iPhone 5 One Plan.

[ENDED] WIN! £15 to spend on the iTunes store (UK)

Yes – it’s competition time again! This time, we’re giving away a £15 iTunes gift voucher for you to spend anywhere on the iTunes store. Whether you’re looking to stock up on some new music or just want to grab some cool apps for your iPhone, iPod or iPad – this is the competition for you.

As with the last competition – all you need to do to enter is simply like GEEK! on Facebook (go to the page and click ‘Like’) and then fill in the form underneath.

This competition has now ended. Thanks to everyone who entered.