Got a printer kicking around that you wish had AirPrint? Maybe it’s one you’ve had for several years, or maybe it’s a cheaper one you recently picked up and wished it had support for your iPhone, iPad or iPod touch. In any case, if you’ve got yourself a Raspberry Pi, have 20 minutes to spare and a tiny bit of experience with SSH, you can get your printer working natively in AirPrint in a flash!
It doesn’t matter whether your printer connects via USB, Ethernet or Wi-Fi – this trick will still work. I’ll guide you through the process!
Step 1: Ensure your Raspberry Pi is up to date.
This might seem like a no-brainer, but you’ll find yourself installing out of date software if you don’t keep your Pi’s sources up to date. Open up a VNC connection with your Pi and then open Terminal. Run the following:
sudo apt-get update
then
sudo apt-get upgrade
If there are any upgrades listed, type Y and press Enter to continue installing updates. Once that’s done, you can start installing your device.
Step 2: (If you’re connecting via USB) Connect your printer with its USB cable.
If you printer normally connects via USB, now would be a good time to connect it to your Pi’s USB port. If you’re currently connecting your printer via Ethernet or Wi-Fi, run straight to step 3. Don’t panic about unplugging it from about PC that it was connected to before – it’ll be a wireless printer soon!
Connect the printer to your Pi and reboot the Pi with the following command:
sudo reboot
Once it has rebooted and you’re back at a desktop, run Terminal again and then run:
lsusb
All devices that are connected via USB should be listed at this point. If your printer doesn’t show, make sure it is turned on and functioning normally.
Step 3: Install samba and CUPS.
At this point you can start installing the backbone software that will provide the printer networking. In terminal, run the following commands:
sudo apt-get install samba
You’ll probably see apt asking to install a relatively large number of packages – don’t worry about this, just press Y and then Enter to continue. When that’s done, then run:
sudo apt-get install cups
Again, you’ll see apt wanting to install an assortment of packages. Carry on as before! After that, you just need to add a printing administrator so that CUPS can manage printers on the Pi. Run the following command:
sudo usermod –a –G lpadmin pi
Step 4: Add your printer.
You now need to add your printer to your print server. To do this, you need to navigate to the CUPS user interface. Open up a web browser on your Pi and then navigate to 127.0.0.1:631. You should see something like this:
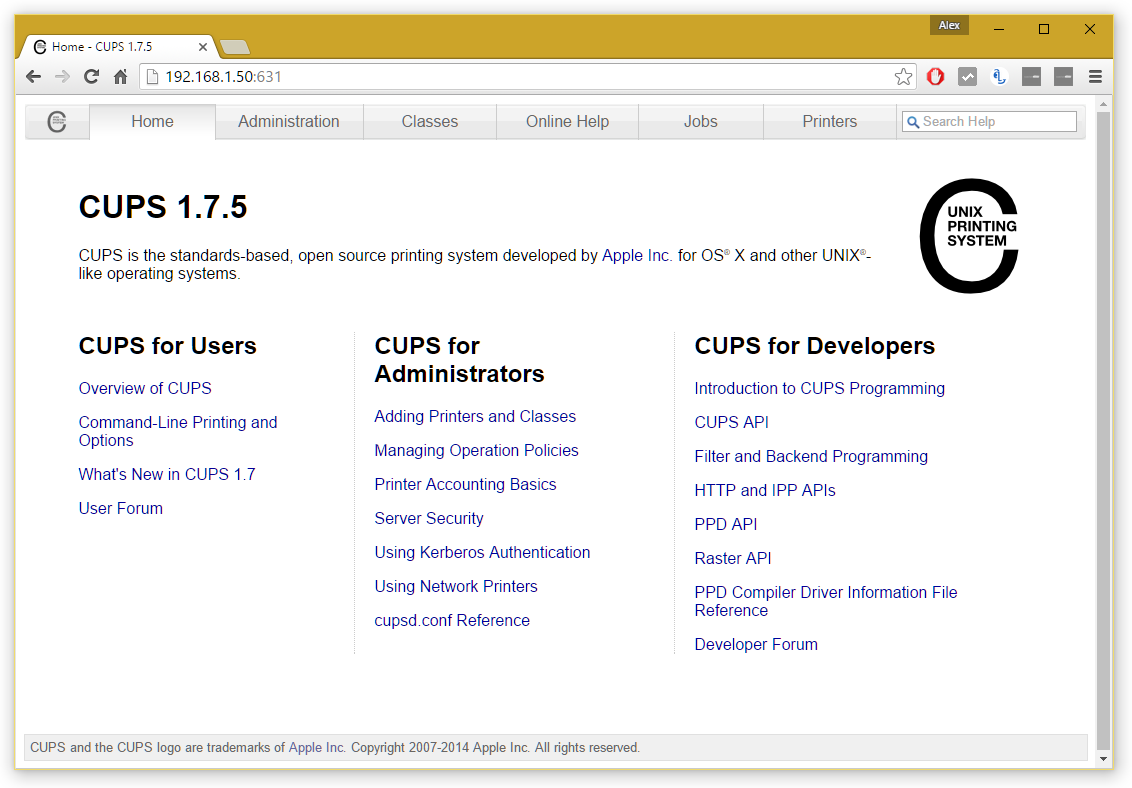
CUPS admin homepage
Click the Administration tab, then click Add Printer. You may be asked to switch to SSL at this point – just follow the link it tells you to go to. You’ll then be prompted to log in – just use your normal Pi credentials (username is usually Pi and the password either raspberry or whatever you might have changed it to.
Once you’re logged in, you should be given a list of currently connected printers. Find yours in the list – it should show up however it is connected (either by USB or over your network). Select it, then click Continue.
At the next step, give it a name (you can keep the default if you wish), a description (this is how your printer will be identified to your iDevice) and a location (optional). Make sure you tick Share This Printer and then click Continue.
Next, you need to select a driver. With any luck your Pi should have already identified a suitable driver – if not, you may need to scroll through the list until you find a suitable candidate. Then click Add Printer and select any default preferences you may have. Click Set Default Options when you’re done and that’s the hardest bit done!
You can check the printer has been added successfully by heading over to the Printers tab and ensuring your printer is shown. To print a test page, select your printer from the list, click the Maintenance dropdown and then click Print Test Page.
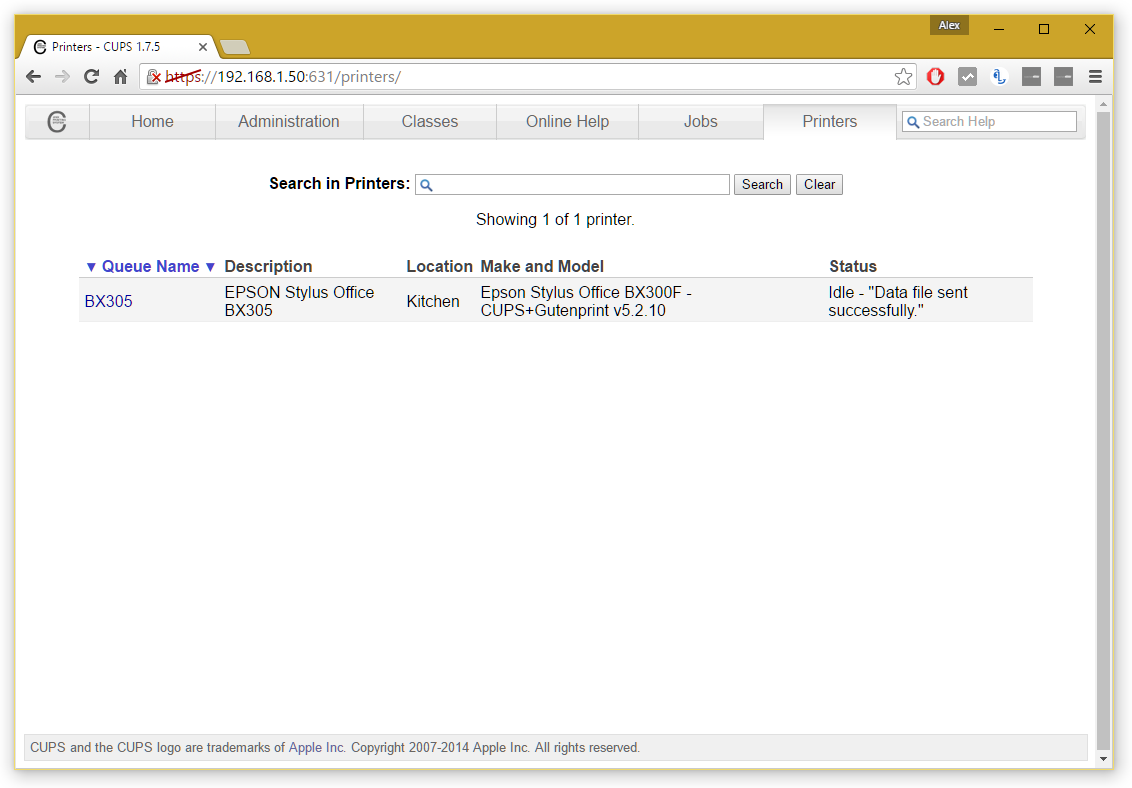
Hopefully your printer is listed at this point!
Step 5: Fine tune a few settings.
A few settings should be fine tuned here to get best performance. Return to the Administration tab and check Share printers connected to this system. If you want to be able to manage CUPS (i.e. add new printers) remotely in future over your network, also check Allow remote administration. Then click Change Settings, the server will then reboot and you’re all good at this point.
Step 6: (Optional) Add Samba support for Windows networking
If you want to use your printer with a Windows device after this setup, you’ll need to activate Samba for Windows. To do this, run Terminal once more and run the following:
sudo nano /etc/samba/smb.conf
Scroll right to the bottom and then paste in the following:
# CUPS printing. See also the cupsaddsmb(8) manpage in the
# cupsys-client package.
printing = cups
printcap name = cups
[printers]
comment = All Printers
browseable = no
path = /var/spool/samba
printable = yes
guest ok = yes
read only = yes
create mask = 0700
# Windows clients look for this share name as a source of downloadable
# printer drivers
[print$]
comment = Printer Drivers
path = /usr/share/cups/drivers
browseable = yes
read only = yes
guest ok = no
Now, do CTRL + W and type in workgroup, followed by Enter to find workgroup configuration. Your workgroup is probably already correctly set it if you haven’t ever changed your workgroup before – if you have, set the correct name at workgroup =. Then change wins support = no to wins support = yes.
Then do CTTL + O on your keyboard, followed by Enter, to save that configuration.
Restart samba with the following command:
sudo /etc/init.d/samba restart
Your printer will now work on a Windows network.
Step 7: (If your Raspberry Pi is connected to your network via Wi-Fi) Change a quick setting here.
Skip this step if your Pi connects to your network via an Ethernet cable. If it uses Wi-Fi, you need to turn off power saving for its Wi-Fi adapter to prevent it going to sleep and isolating AirPrint. To do this, you need to edit a file in Terminal:
sudo nano /etc/modprobe.d/8192cu.conf
Add the following at the bottom:
# No power saving
options 8192cu rtw_power_mgnt=0 rtw_enusbss=1 rtw_ips_mode=1
Then do another CTRL + O, followed by Enter to save changes.
Step 8: Install Bonjour for AirPrint
Nearly there, I promise! You now need to install the AirPrint software. This is a doddle, thankfully!
Still in your Terminal, run the following command:
sudo apt-get install avahi-discover
Let that install as normal – this shouldn’t take long! Once that’s done, it would be a good idea to reboot your Pi to let all these settings sink in. In terminal, run:
sudo reboot
Step 9: Test it out!
All should now be up and running – you’ll be pleased to know that’s the configuration done! Grab an iOS device, open up an email or Safari page, and follow the Share icon until you find a Print option. Hit Select Printer and yours should (fairly quickly) appear. If it doesn’t, don’t panic! Give it a couple more minutes and then try again – it should appear after a couple of tries the first time.
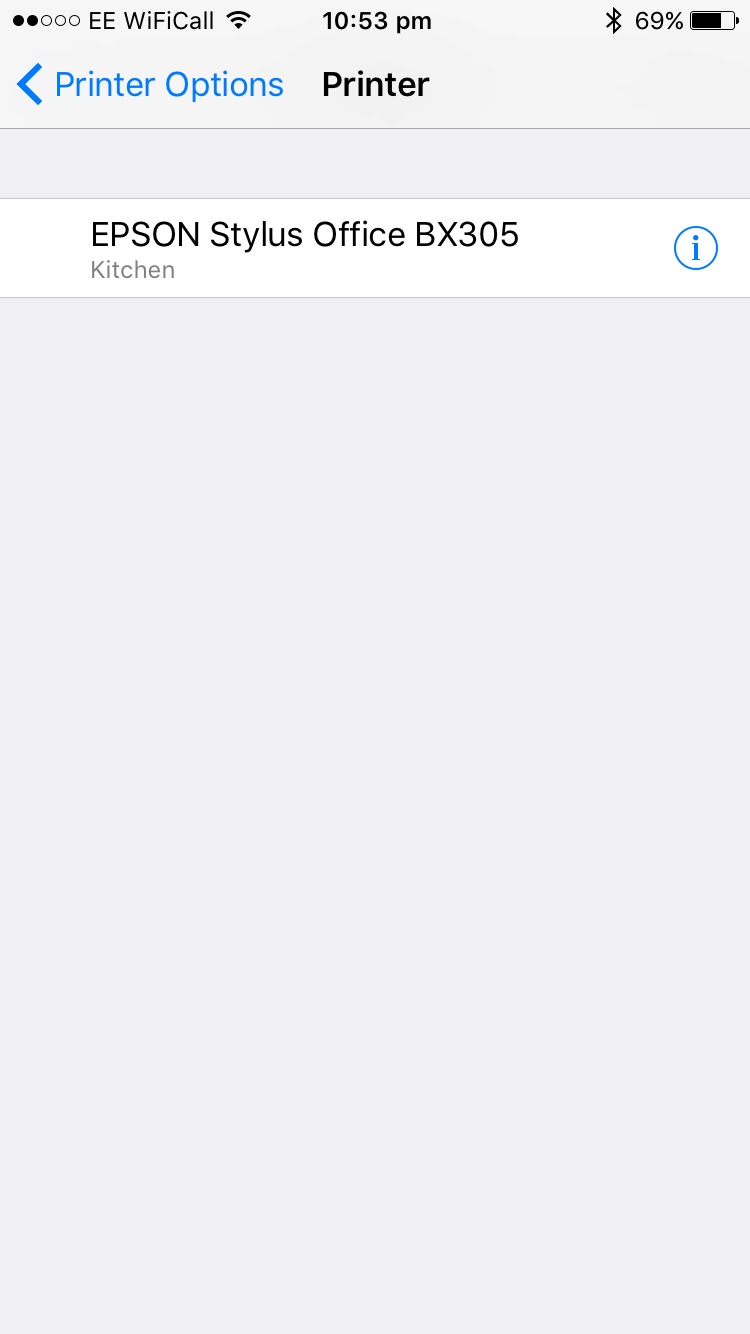
Your printer should appear at this point.
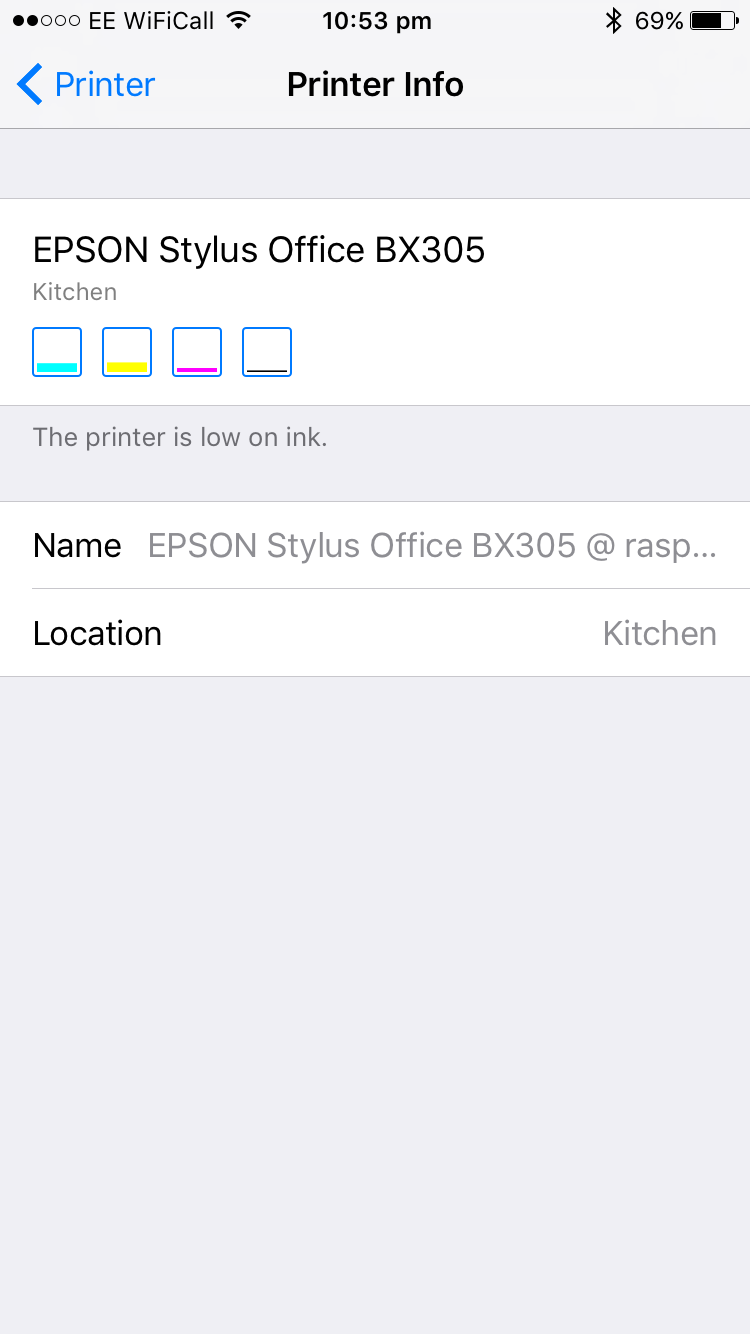
If you click the (i), you might even be able to check ink levels.
Select your printer, adjust any preferences you wish, and then click Print. Voila! It might take a few seconds to spool with your printer – this is to be expected.
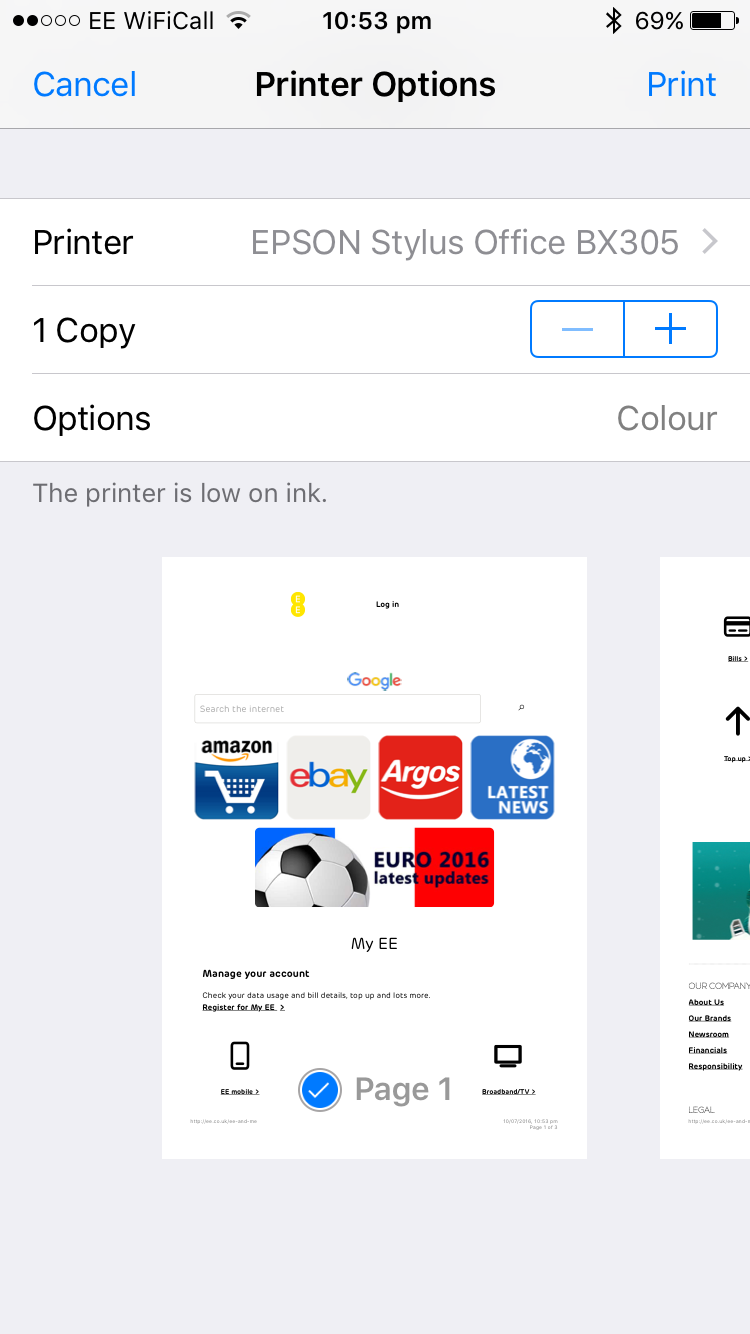
Once you’ve chosen the printer, adjust any preferences such as number of copies and page selection, then click Print.
And there you have it! An AirPrint printer with a little configuration from your Pi. If you’d like to add more printers to your network, you’ll need to return to the CUPS administration panel and repeat Step 4. In any case, you should now have a printer that works over your network and on all of your favourite iOS devices, without the need for any third party app!